Restaurant Photo Station in a Tight Kitchen: The 10-Minute Setup
Most restaurants do not have room for a studio, and they do not need one. A good restaurant photo station is a small, repeatable corner you can build in 10 minutes, shoot a batch of dishes against, and break down when service starts. The secret is not gear. It is removing decisions: one surface, one light direction, one default angle. Lock those and a busy line cook with a phone can produce menu photos that look like one consistent brand.
The fast version
- Consistency beats "perfect" gear.
- Pick one surface, one light direction, and one default angle.
- Build a station you can keep up for a few hours, not a studio you rebuild every time.
The fastest station that works in real restaurants
You need almost nothing:
- A small table or prep cart you can wheel to the light.
- One background surface: white, light wood, or neutral stone.
- A white foam board as a reflector.
- A clean microfiber cloth to wipe plates, drips, and your lens.
That kit fits in a drawer and costs less than a single dish on your menu. Keep it together so the station is always 10 minutes from ready.
Step 1: Find the light
Look for one of these, in order of preference:
- A window with indirect daylight (not direct sun).
- A doorway with consistent daylight.
- A single continuous light you can point and diffuse.
Avoid mixed lighting, where daylight fights yellow overhead kitchen lights, because color becomes inconsistent across dishes and the menu loses its unified look. If your only option is overhead fluorescents, shoot a clean phone reference and fix the light later in enhancement rather than fighting it on the spot.
Step 2: Lock your default shot
Pick one angle your whole team repeats:
- 45 degrees for most plates.
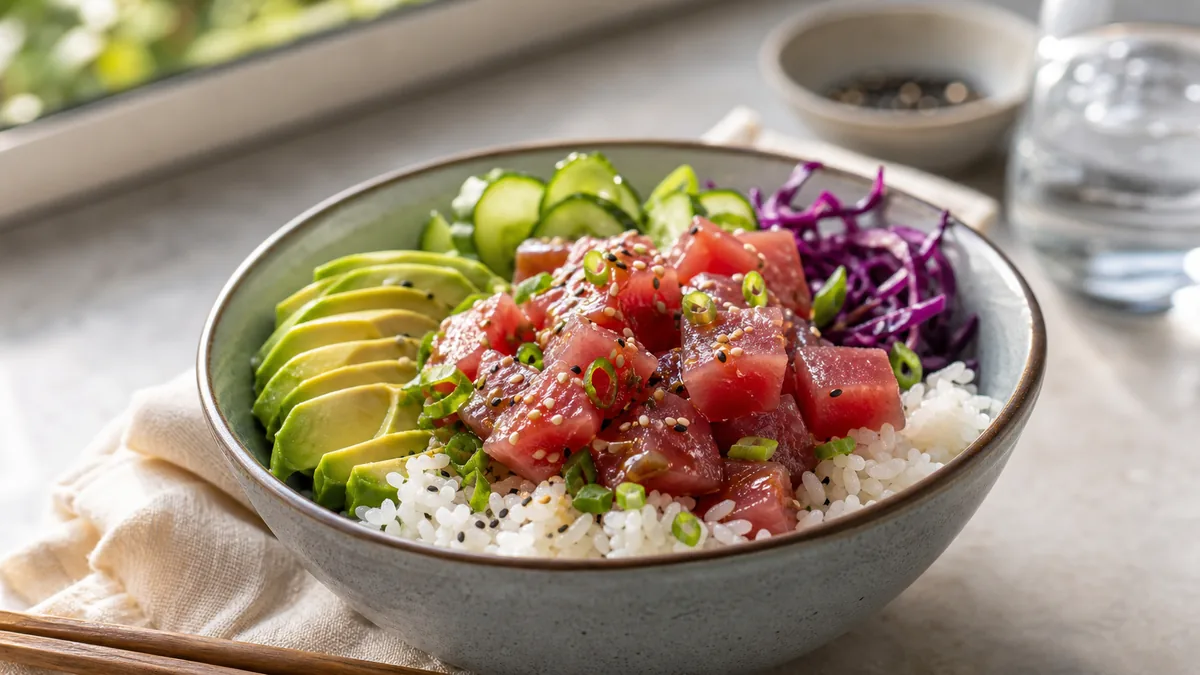
- Overhead for bowls, pizzas, and platters.
Default shots are what make a menu look like one brand. Mark the table edge with painter’s tape so anyone can place the dish and phone the same way every time. For when overhead is the right call, our flat-lay guide covers the framing.
Step 3: The station checklist (print this)
Run this on every session:
- Lens cleaned.
- Same background as last shoot.
- Same light direction (mark the table edge with tape if needed).
- Plate edges wiped clean.
- Hero ingredient centered with space around it for later crops.
- Three frames per dish: default angle, overhead (if relevant), close texture.
This is the difference between a menu that looks intentional and one that looks like a dozen different phones took it.
Step 4: Publish without rework
Keep one high-quality master photo per dish and export the crop each channel needs instead of re-shooting per platform. A loose crop turns a great dish into an unreadable thumbnail, so always check the result at small size before uploading. For the full shoot-to-publish flow, see our menu photography operator guide.
Where honest enhancement fits
A tight-kitchen station gets you a clean, sharp frame, but a phone still struggles with the lighting and color a small space throws at it: warm overhead spill, a window that is brighter than you want, a busy background you could not fully clear. That is the gap FoodPhoto.ai closes. It takes a real photo of your real dish and corrects lighting, color, gloss, and background without changing the food, so a quick phone shot from a prep cart ends up looking studio-grade for a few cents. Keep it honest: enhance light and clarity, never invent ingredients or change portions.
Working around a small space
Tight kitchens throw a few predictable problems at a photo station. Here is how to handle each without buying anything:
- No good window. Use a doorway with daylight, or shoot during the part of the day when light reaches your space. If neither works, a single diffused continuous light pointed from the side beats overhead fluorescents every time.
- Cluttered background you cannot clear. Stand a single background board on the cart behind the dish. A piece of neutral board hides an entire busy kitchen.
- Nowhere to mount the phone. A cheap phone clamp on the edge of the cart gives you a repeatable overhead or angled position so every shot matches.
- Constant interruptions. Keep the kit assembled so setup is genuinely 10 minutes. The faster the station is to deploy, the more often it actually gets used.
- Mixed color from multiple light sources. Turn off what you can, shoot toward your one good light, and correct any remaining cast in enhancement rather than fighting it live.
The goal is never a perfect studio. It is a corner that produces consistent, clear frames in the time you have between prep and service.
Why this beats buying gear
Operators often assume better photos require a better camera. In practice, the variables that decide whether a menu photo converts are light direction, a clean background, an accurate color, and a crop that reads at thumbnail size. A prep cart, a window, and a phone control all of those. Spending on a real camera while shooting under random overhead lights against a cluttered background buys you a sharper photo of the same problems. Fix the station first; it is cheaper and it matters more. For the full shoot-to-publish flow that this station feeds, see our menu photography operator’s guide.
Quick-reference gear and settings
Keep this list taped inside the cart so anyone can assemble the station without thinking:
| Item | Why it matters | Cheap option |
|---|---|---|
| Prep cart / small table | Wheels the station to the light | Any rolling rack you already own |
| Background board | Kills clutter behind the dish | A painted foam board or clean cutting board |
| White foam reflector | Fills shadows for a balanced look | A folded white napkin or paper |
| Microfiber cloth | Wipes plate rims and the lens | One from the bar caddy |
| Painter’s tape | Locks the angle and cart position | Any tape in the kitchen |
| Phone clamp (optional) | Repeats the exact framing hands-free | A small clip stand |
Nothing on that list is specialized, and the whole kit costs less than one entrée on your menu. The discipline — same spot, same light, same default angle — is what produces studio-looking results, not the price of the gear.
Make it a team habit
The station only pays off if it is used. Keep the kit assembled, mark the tape, and give your team the one-page version of this checklist. To turn it into a recurring rhythm rather than a one-off, run the weekly restaurant photo sprint, which uses exactly this kind of station to keep top sellers and specials fresh.
You do not need space or gear to ship consistent menu photos. You need a corner, a window, and a repeatable checklist. Set up the station once, shoot a batch, enhance honestly, and your menu will start looking like one confident brand. See pricing when you are ready to keep it going.
Frequently asked questions
How do I set up a food photo station in a small kitchen?
Use a small table or prep cart, one background surface, a white foam-board reflector, and a clean microfiber cloth. Place it near a window with indirect daylight, lock one light direction and one default angle, and you have a station you can rebuild in about 10 minutes whenever you need it.
What is the best light for a tight-kitchen photo station?
Soft, indirect daylight from a window or doorway is the easiest and most flattering. Avoid mixing daylight with yellow overhead kitchen lights, because the color shifts between dishes and the menu stops looking consistent. If you have no usable window, one diffused continuous light works.
Do I need a lot of gear for a restaurant photo station?
No. Consistency beats expensive equipment. A prep cart, one neutral surface, a white reflector, and a phone are enough. The variables that actually matter are a fixed light direction, a clean background, and a repeatable default angle, none of which require a real camera.
What default angle should the team use?
Use 45 degrees for most plated dishes and overhead for bowls, pizzas, and platters. Picking one default and repeating it is what makes a menu look like one brand. Mark the table edge with tape so anyone can hit the same angle without thinking about it.