The Weekly Restaurant Photo Sprint: A 60-Minute System for Specials, Delivery Apps, and Social
If your restaurant photos only get updated during an occasional "big shoot," your images will always be out of date. Restaurants change too fast — specials rotate, portions evolve, plating drifts with staff, and delivery apps quietly punish stale listings. The fix isn't a bigger shoot. The fix is a weekly restaurant photo sprint: one focused hour, every week, forever.
This is an operating system, not a creative project. Treat menu photos the way a kitchen treats prep — scheduled, repeatable, and boring on purpose — and quality goes up while stress goes down.
The mindset: ship photos like you ship food
In a kitchen, you don't wait until you "have time" to prep. You schedule prep. Menu photos work the same way. When photography is a recurring weekly habit instead of a once-a-year event, your delivery listings, website, and social stay aligned with what you actually serve right now.
Set up once (about 35 minutes)
Do this one time and you'll stop fighting the same problems every week.
A consistent photo station (15 minutes)
- One background surface (wood, stone, or a neutral mat).
- One consistent light source — a window works fine.
- One bounce card (white foam board) to lift shadows.
- A phone tripod for repeatable framing.
If your photos look different every week, it's almost never the camera. It's the station.
A one-page style guide (10 minutes)
Decide and write down: your two or three default angles, how close the dish should sit (fill about 70% of the frame), your background rules (one or two surfaces only), and your editing direction (bright vs. moody, warm vs. neutral). This is what makes your menu look like one restaurant instead of twelve random days. If you need help choosing a look, our guide to the best food photography styles for social media walks through which style fits which brand.
A folder system your staff can follow (10 minutes)
Create a predictable structure your whole team uses:
Menu Photos / 2026-Week-25 / OriginalsMenu Photos / 2026-Week-25 / EnhancedMenu Photos / 2026-Week-25 / Exports / DoorDashMenu Photos / 2026-Week-25 / Exports / UberEatsMenu Photos / 2026-Week-25 / Exports / WebsiteMenu Photos / 2026-Week-25 / Exports / Social
You're not building "a library." You're building a system that prevents chaos. Pair it with a clear file naming convention so "which version is live?" never slows you down.
The weekly sprint, minute by minute
Put this on the calendar like a prep shift:
| Minute | Step | Output |
|---|---|---|
| 0–10 | Pick the 8–12 items | A shot list |
| 10–30 | Shoot the items | Clean phone originals |
| 30–45 | Enhance consistently | Menu-ready images |
| 45–55 | Export crops | Delivery / website / social sizes |
| 55–60 | Publish + log | Updates shipped, notes saved |
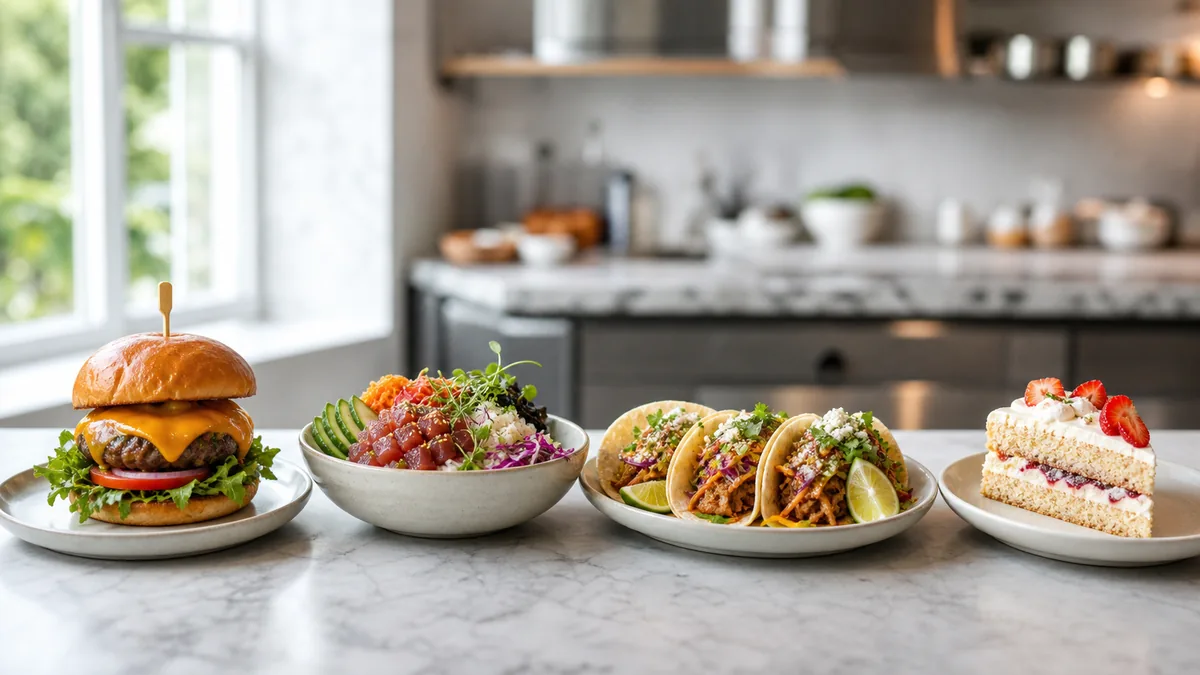
The shot list: shoot what moves revenue
Don't shoot randomly. Every week include three top sellers (keep them current and consistent), three high-margin items you want to push, and two specials or limited-time items. Optionally add one seasonal update or one high-ticket bundle/family meal. That mix keeps your most profitable items looking premium while your specials stay fresh.
Three roles so it doesn't depend on you
In a small shop one person can do all three, but define them anyway:
- Shooter — captures clean, sharp, well-framed base images in the station.
- Quality checker — approves the best frame per dish and catches trust issues: the dish looks different from reality, a wrong or missing garnish, messy plate edges.
- Publisher — exports the correct crops and updates delivery platforms, the website menu, Google Business Profile, and social.
The no-regrets shooting checklist
Before you enhance anything, confirm:
- Lens is clean (wipe it — fingerprints kill sharpness).
- Focus is sharp on the hero texture.
- Shooting on the 1x lens (no wide-angle distortion).
- The dish fills the frame with room for platform crops.
- Plate edges are clean.
- Background is clean.
- Lighting is consistent — avoid mixed overhead light.
This checklist saves more time than any editing tool, because clean inputs make every later step faster.
Enhance and export in the right order
The biggest waste is enhancing before you know your export needs. Do it in this order: enhance for clarity and consistency (lighting, color, background cleanup) → export platform crops (delivery, website, social) → publish and replace everywhere. Use the same export recipe every week so you never re-do work. This is exactly where FoodPhoto.ai fits: feed it your clean phone originals and it returns consistent, menu-ready images you can crop for each surface — without changing the food. Run a dish through the Menu Test Pack to see the before/after on your own plate.
Publish where it matters first
For fast impact, prioritize the surfaces where photos directly drive choices:
- Delivery apps (DoorDash, Uber Eats, Grubhub) — thumbnail-first, highest leverage. See our DoorDash menu photo playbook for the crop logic.
- Website menu pages (if you show photos there).
- Google Business Profile — freshness and conversion.
- Social — reuse your two or three best frames.
Track, iterate, and scale
You don't need complex attribution. Track what you can: which dishes get the most delivery-app clicks, which items get ordered more after a refresh, and which photos get saved or shared. Then test small weekly variations — tighter vs. wider crop, top-down vs. 45° for a category, brighter vs. warmer edits (keep it realistic).
Running multiple kitchens? The sprint scales by standardizing more: one central style guide, one approved background pack, one approved-angles list, one shared folder structure, and one reviewer who approves each batch before it publishes. That's how groups look consistent without paying for constant shoots.
Run the sprint four weeks in a row, compare your delivery and order data against your own baseline, and let the results decide. Ready to make the enhancement step effortless? Check pricing and turn one hour a week into a menu that always looks current.
Related workflow links
Use this sprint with a restaurant menu photo refresh calendar and a written AI food photo trust policy. For the enhancement step, review pricing and keep the workflow focused on real dish photos.
FAQ
How long does a weekly restaurant photo sprint take?
About 60 minutes once your station and folder system are set up: 10 minutes to pick items, 20 to shoot, 15 to enhance, 10 to export crops, and 5 to publish and log.
How many dishes should a restaurant photograph each week?
A practical weekly target is 8 to 12 dishes: top sellers, high-margin items, specials, and one seasonal or bundle shot if needed.
Why is a weekly sprint better than one large restaurant photoshoot?
A weekly sprint keeps photos aligned with the current menu, specials, plating, and delivery-app crops instead of letting images drift for months.
Can this workflow work for multiple restaurant locations?
Yes. Use one shared style guide, approved angles, consistent folders, and a single reviewer so each location ships a comparable weekly batch.