How to Edit Food Photos Like a Pro: The Restaurant Workflow
Knowing how to edit food photos like a pro is mostly about order and restraint. Professionals fix lighting and color first, clean the background second, and export platform crops last, and they keep every edit realistic so the food still looks like the food. This restaurant-focused workflow walks through each step and shows how to apply it consistently across an entire menu without spending hours per image.
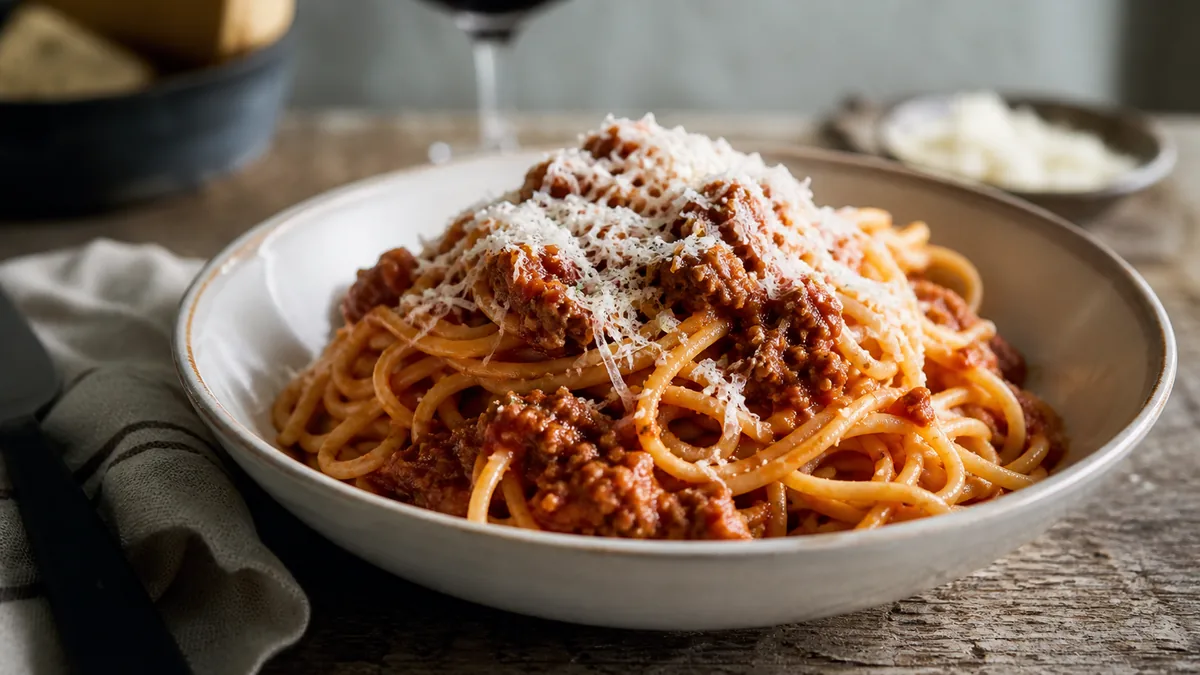
The principle that holds it together: the goal is appetizing and accurate, not surreal. A photo that oversells leads to disappointed customers and reviews that mention the gap. Edit to reveal the real dish at its best.
The professional editing order
Editing in the right sequence saves time and produces better results. Follow these four steps:
- Pick the sharpest frame. Start from the cleanest, best-focused shot. No edit fixes soft focus.
- Correct exposure and color. Brighten and even out the lighting, then neutralize color casts so the food looks true to life.
- Clean the background. Remove clutter, distractions, and stray reflections so attention stays on the dish.
- Export platform crops. Produce the delivery, web, and social sizes you need from the finished master.
Each step builds on the last. Color-correcting before you crop, for example, means every export inherits the same accurate color.
Step 1: Fix lighting and color first
This is where most restaurant photos win or lose. Indoor bulbs add yellow casts, windows add blue ones, and kitchens are rarely evenly lit. Your first job is to make the dish bright, evenly exposed, and true to color.
- Lift shadows so texture and detail are visible.
- Balance highlights so glossy sauces and melted cheese do not blow out.
- Neutralize the color cast so the food matches what it looks like in person.
Get this right and the photo already looks dramatically more professional, before you touch anything else. For getting better light at capture so there is less to fix, see our professional iPhone food photography checklist.
Step 2: Clean the background
A clean background is the difference between a snapshot and a menu photo. Remove or de-emphasize:
- Clutter, utensils, and packaging that distract from the dish.
- Hands, kitchen mess, and busy surfaces.
- Harsh reflections and distracting color in the surroundings.
The food should be the obvious subject, with a simple, tasteful surface around it.
Step 3: Add natural gloss and finish
A subtle finishing pass makes food look fresh: a touch of gloss on sauces, a little vibrance in the garnish, crisp edges on the protein. The key word is subtle. Push it too far and the dish looks plastic. Pull just enough to make it look freshly served.
Step 4: Export the right crops
Finish by exporting from one master so you never re-edit per platform:
- Square for Instagram and menu cards.
- Vertical for Reels, Stories, and TikTok.
- Platform-spec crops for DoorDash and Uber Eats.
- Wide for your website and Google Business Profile.
Shoot crop-safe (hero centered, margin around the dish) so a single master survives every layout. Our DoorDash + Uber Eats photo requirements guide covers the exact sizes.
The fast way: enhance, don’t hand-edit every photo
Doing all four steps by hand in editing software works, but it is slow and hard to keep consistent across a full menu. The professional shortcut for restaurants is to run each photo through one enhancement that handles lighting, color, gloss, background, and crop in a single pass, while keeping the food exactly as it is.
That is what FoodPhoto.ai does: upload a real phone photo of your real dish and get back a clean, consistent, menu-ready image in minutes, no editing skills required. Because every photo gets the same correction, your whole menu stays on-brand. Try it on a tricky photo in the Menu Test Pack.
What each adjustment actually does
If you do edit by hand, it helps to know what each control is for so you do not over-reach:
| Adjustment | What it fixes | Watch out for |
|---|---|---|
| Exposure / brightness | Dim, underlit photos | Blowing out highlights on cheese or sauce |
| White balance | Yellow or blue color casts | Making the food look unnaturally cool or warm |
| Contrast | Flat, lifeless images | Crushing shadow detail to pure black |
| Highlights / shadows | Uneven light, hidden texture | Halos and an HDR "fake" look |
| Vibrance / saturation | Dull garnish and color | Neon, plastic-looking food |
| Sharpening | Soft details | Crunchy, over-sharpened edges |
The pattern is the same everywhere: a little goes a long way, and the failure mode is always pushing too hard.
How to keep a whole menu consistent
Editing one photo well is easy. Editing forty photos so they all match is the hard part, and it is what makes a menu look professional. Three habits keep it consistent:
- Define a recipe. Decide your target brightness, white balance, and finish once, and apply the same values to every dish.
- Edit in batches. Process all of a session’s photos together so they share the same look, rather than editing one here and one there over weeks.
- Compare side by side. Before publishing, view the new photos next to existing menu images. Anything that stands out gets re-edited to match.
The simplest way to guarantee all three is to run every photo through one enhancement that applies the same correction automatically, which removes the guesswork entirely. The discipline behind this is the same one top restaurants use to run photos as a growth system.
The "don’t over-edit" rule
Whatever tool you use, hold the line on realism. Never change the portion, never invent ingredients, never make the dish look like something a customer will not receive. Honest enhancement is the durable strategy; surreal editing earns refunds and one-star reviews.
Edit in order, keep it accurate, and standardize the process so every dish matches. When you want a fast, consistent way to do all of this across a full menu, see our simple credit-based pricing and turn raw phone shots into polished, professional photos in minutes.
Turn this strategy into menu-ready photos
FoodPhoto.ai helps restaurants enhance real dish photos for delivery apps, websites, ads, and local search while keeping the food accurate to what guests receive.
See pricing or open the FoodPhoto.ai Studio.
Frequently asked questions
How do you edit food photos like a professional?
Work in order: fix exposure and color first so the food looks accurate, then clean the background and remove distractions, then export the crops each platform needs. Keep edits realistic. The goal is appetizing and accurate, not surreal. Apply the same recipe to every dish for a consistent menu.
What should I fix first when editing food photos?
Lighting and color. Correct exposure so the dish is bright and evenly lit, then neutralize any yellow or blue color cast so the food looks true to life. Most amateur food photos fail on color before anything else, so fixing it first does the most work.
How do I avoid over-editing food photos?
Keep the food accurate. Enhance lighting, color, gloss, and background, but never change the portion or invent ingredients. If the edited photo would surprise a customer when the dish arrives, you have gone too far. Realistic enhancement builds trust; surreal editing damages it.
How do I keep food photo edits consistent across a menu?
Use the same enhancement recipe and the same export sizes for every dish, every time. The fastest way to guarantee consistency is to run all photos through one tool that applies the same correction, so dish one and dish twenty look like they belong to the same brand.
Related guides
- 27 fixes to make photos look expensive
- One lighting setup that works
- Turn a phone photo into menu-ready images
Ready to upgrade your menu photos? Open the FoodPhoto.ai studio or see plans and pricing.